Sổ tay người dùng Remote Universal GE 40081
Th12
HUONG DAN SU DUNG DIEU KHIEN TU XA UNIVERSAL GE 40081 Huong dan su dung dieu khien tu xa GE 40081 Ban can hai (2) vien pin AAA (khong bao gom trong hop). Pin khoang nap duoc khuyen cao. Lap dat pin: Tren mat sau cua dieu khien, rut xuong tren mat nhan vien va truot nap pin xuong de thao ra khoi. Kich thuoc (+) va (-) tren pin phai phu hop voi (+) va (-) tren ngan pin ben trong, sau do chen hai (2) pin AAA vao. Luu y su dung pin moi. Dua nap pin xuong phia duoi o vi tri mo va day len de khong bi roi ra. LUU Y: Neu dieu khien bi hong, hay thay pin moi. Phong chong tinh dien: Khong tron lan pin cu va moi. Khong tron lan pin khoang nap voi pin thong thuong (cacbon, zinc) hoac pin sac (Ni-Cd, Ni-MH, v.v.). Luon thao ra pin cu, yeu hoac hong som va tai su dung hoac xu ly theo quy dinh dia phuong va quoc gia. Tiet kiem pin: Dieu khien se tu dong tat neu cac nut duoc an trong thoi gian hon 8 giay. Dieu nay se giup tiet kiem pin trong truong hop dieu khien bi ket lai o noi cac nut van bi an ngay le.g., giua ghe sofa). Luu ma: Ban co toi da 10 phut de thay pin trong dieu khien ma khong mat ma trong may chuong ma da lap dat. Chuc nang cua nut Nhiet – Bat/Tat thiet bi Cai dat – Su dung de lap dat dieu khien Nhap – Chon cac dau vao video TV, DVD, storm, aux – Chon thiet bi can dieu khien Ghi am, phat, dung lai, tua nhanh lui, tua nhanh toi, tam dung UA chuong – Lap trinh len toi 10 kenh yeu thich de truy cap nhanh mon Tiep – mo/dong mot may phat hoac Danh sach tinh nang tren may thu/cap co HD Home/Guide – De dang truy cap cac tinh nang tren thiet bi truyen streaming ngay nay, hoac Huong dan tren may thu/cap co Menu – Hien thi menu tren man hinh Len/Xuong/Trai/Phai chon menu OK – Chon cac mon menu cho thiet bi duoc kiem soat Ra – Thoat menu tren man hinh Thong tin – Hien thi thong tin chuong trinh/noi dung Am luong len/xuong am luong Len/xuong kenh Im lang – Im lang am thanh Kenh truoc day – Quay lai kenh da chon truoc do So – Nhap so cho lua chon truc tiep Phay duoc dung de chon kenh so, vi du, 4.1 Nut Enter (Mot so thiet bi yeu cau phai an nut Enter sau khi lua chon kenh) Lap dat dieu khien Dieu khien tu xa duoc thiet ke de dieu khien nhieu thiet bi am thanh/hinh anh khac nhau. De su dung no, ban can lap dat dieu khien cho thiet bi cua ban. Co hai phuong phap khac nhau ma ban co the su dung de lap dat dieu khien, En Nap Ma Truc tiep hoac Tim Kiem Ma Tu Dong. Phuong phap EN Nap Ma Truc Tiep duoc khuyen cao vi no la phuong phap don gian va nhanh nhat trong hau het cac truong hop. Phuong phap Tim Kiem Ma Tu Dong se tim kiem qua tat ca cac ma trong dieu khien de tim ma cho thiet bi cua ban. LUU Y: Dieu khien nay duoc cai san truoc cho hop Roku® va TV cua Samsung. An TV de dieu khien TV cua Samsung va Aux de dieu khien hop Roku. EN Nap Ma Truc Tiep (Duoc khuyen cao) Tim Bo Ma duoc cung cap cung voi dieu khien tu xa cua ban. Tim cho nao cua loai thiet bi ban muon dieu khien, (vi du TV, DVD, Ker, aux). Tim hieu ve nhan hieu cua thiet bi cua ban va vong tron tat ca cac ma dieu khien cho nhan hieu do. An va giu giu nut Setup tren dieu khien cho den khi den LED tren dieu khien tu xa sang len. Buong nut Setup. Den LED se sang. LUU Y: Den LED co the la den nho o phia tren dieu khien hoac nut BAT/TAT. An va nhap nut cua thiet bi tren dieu khien cho loai thiet bi ban muon dieu khien, (vi du TV, DVD, storm, aux) Den LED se nhap mot lan va sang len. LUU Y: Bat ky nut thiet bi nao tren dieu khien cung co the duoc lap trinh de dieu khien bat ky thiet bi nao cua ban. Vi du, ban co the su dung nut Aux tren dieu khien de dieu khien mot hop truyen cap, may thu vi, thiet bi chuyen doi so, may choi media, hoac bat ky danh muc thiet bi nao trong Bieu do Ma. Su dung cac nut so tren dieu khien de nhap ma dieu khien 4 chu so dau tien ma ban da vong tron o Buoc 1. Den LED se tat sau khi nhap chu so thu tu. Huong dieu khien ve phia thiet bi. Kiem tra cac nut tren dieu khien de xem thiet bi co phan hoi nhu ban mong doi hay khong. Neu cac nut khong hoat dong tren thiet bi, quay tro lai Buoc 2 o tren va su dung ma tiep theo ma ban da vong tron cho thiet bi do. Lap lai cac Buoc 1–5 cho moi thiet bi ma ban muon dieu khien Bieu do lap trinh Mot so ma co the chi dieu khien mot so chuc nang cua thiet bi cua ban. Co the co ma khac trong Bieu do Ma dieu khien cho nhieu chuc nang hon. Thu cac ma khac trong Bieu do Ma de co nhieu chuc nang hon. Neu ban khong tim thay ma dieu khien nao hoat dong cho thiet bi cua ban hoac khong co ma nao trong Bieu do Ma cho thiet bi cua ban, su dung phuong phap Tim Kiem Ma Tu Dong trong phan ke tiep de lap dat dieu khien cho dieu khien cua ban. Doi voi thiet bi ket hop nhu TV/DVD ket hop hoac TV/Đầu ghi, co the ban can phai nhap ma cho moi thiet bi. Ghi lai cac ma duoc su dung de lap dat dieu khien tu xa de su dung trong tuong lai. Tim Kiem Ma Tu Dong Phuong phap Tim Kiem Ma Tu Dong la mot qua trinh cho phep ban tim kiem qua tat ca cac ma duoc luu trong dieu khien de tim ma cho thiet bi cua ban. Doi voi cac thiet bi ma khong co chuc nang BAT/TAT, thi khong the su dung Phuong phap Tim Kiem Ma Tu Dong. Trong truong hop nay, su dung phuong phap En Nap Ma Truc Tiep. Buoc tay thiet bi ban muon dieu khien. An va giu giu nut SETUP tren dieu khien cho den khi den LED tren dieu khien tu xa sang len. Buong nut SETUP. Den LED se sang. LUU Y: Den LED co the la den nho o phia tren dieu khien hoac nut BAT/TAT. An va nhap nut thiet bi tren dieu khien cho loai thiet bi ban muon dieu khien, (vi du TV, DVD, storm, aux). Den LED se nhap mot lan va sang len. Huong dieu khien ve thiet bi, an va nhap nut POWER tren dieu khien. Dieu khien tu xa se gui 10 ma khac nhau den thiet bi. Den LED se nhap mot lan cho moi ma va sang len sau khi gui xong 10 ma. Thiet bi co tat di khong? Neu CO, di den Buoc 5. Neu KHONG, lap lai Buoc4 de thu 10 ma tiep theo. Buoc tay thiet bi cho len lai. Huong dieu khien ve thiet bi, an và nhap nut VOL +. Dieu khien tu xa se gui lai ma dau tien cua 10 ma tai Buoc Den LED se nhap mot lan va sang len. Thiet bi co tat di khong? Neu CO, ban da tim thay ma cho thiet bi. An và nhap nut thiet bi da nhap o Buoc 3. Dieu khien tu xa se gui 10 ma khac nhau den thiet bi ké phần còn lại của thiết bị. LUU Y: Nut VOL – co the dung de di lui qua moi 10 ma. Đèn chỉ báo đỏ sẽ nhấp nháy 2 lần sau khi thử nghiệm mã đầu tiên hoặc mã cuối cùng trong mỗi nhóm 10. Sử dụng dieu khien tu xa để bật thiết bị. Kiểm tra các nút trên dieu khien xem thiết bị có phản hồi như bạn mong đợi không. Nếu các nút không điều khiển thiết bị, quay về Bước 2 và lap lai quan trinh này de tim ma dieu khien tot hon de hoat dong thiet bi… Lap lai quan trinh nay cho moi thiet bi ban muon dieu khien. Canh bao cho thiet bi ket hop Mot so thiet bi ket hop, thu vi chuẩn TV/VCR, TV/DVD, DVD/VCR, và vân vân) se yeu cau ban phai cài đạt hai nut may khác nhau để dieu khien cả hai phần của thiet bi ket hop. Vi du, neu ban co mot chuẩn TV/DVD, ban có thể cần nhập mã cho cả hai thiết bị. Ghi lại các mã dieu khien ma bạn đã sử dụng de lap đặt dieu khien tu xa cho tham thiết bi. #UniversalRemote #RemoteUserManual #InstructionsVietnamese #GE40081UniversalRemote
GE 40081 Universal Remote User Manual

Setup
Your universal remote requires two (2) AAA batteries (not included). Alkaline batteries are recommended.
Battery Installation
- On the back of the remote, pull down on the textured surface and slide the battery cover downward to remove it.
- Match the (+) and (-) marks on the batteries to the (+) and (-) marks inside the battery compartment, then insert two (2) AAA batteries. Be sure to use fresh batteries.
- Position the battery cover slightly below the opening and push upward to lock it into place.
NOTE:
If your remote stops operating properly, replace the batteries with new ones.
Battery Precautions
- Do not mix old and new batteries.
- Do not mix alkaline, standard (carbon-zinc), or rechargeable (Ni-Cd, Ni-MH, etc.) batteries.
- Always remove old, weak, or worn-out batteries promptly and recycle or dispose of them following local and national regulations.
Battery Saver
Your remote automatically turns off if the buttons are depressed for more than 8 seconds. This will save your batteries should your remote get stuck in a place where the buttons remain depressed le.g., between the sofa cushions).
Code Saver
You have up to 10 minutes to change the batteries in your remote without losing the codes you have programmed.
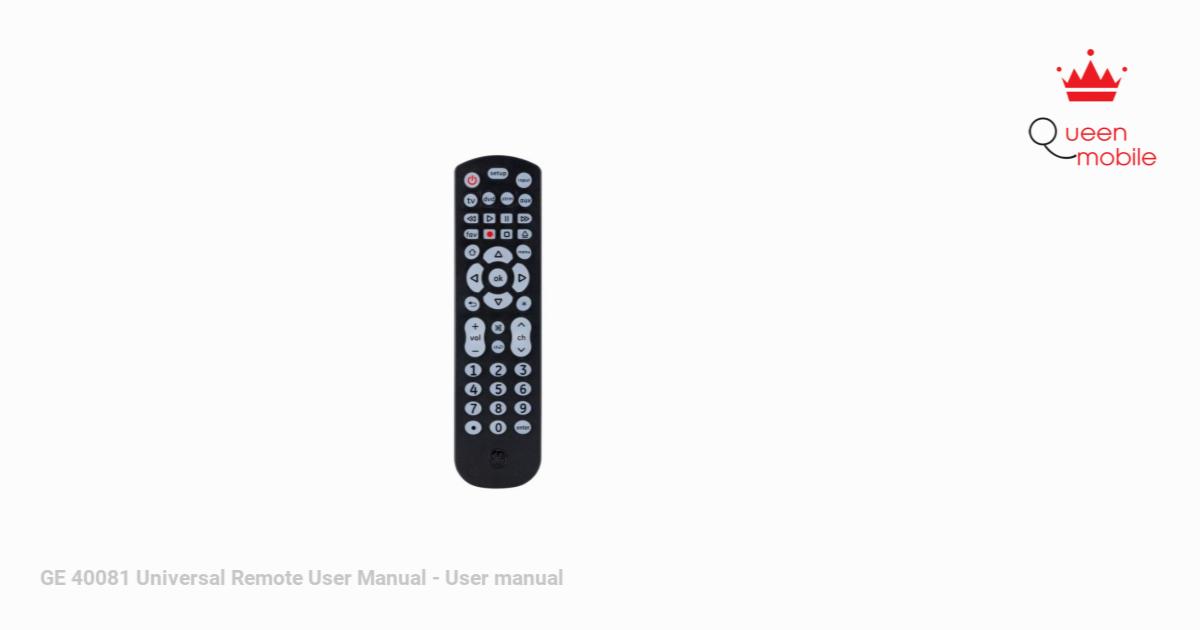
Button Functions

- Power – Turns devices ON/OFF
- Setup – Used to program the remote
- Input – Select video inputs
- TV, DVD, storm, aux – Select the device to control
- Record, play, stop, rewind, fast forward, pause
- Programmable Favorites – Program up to 10 favorite channels for quick access
- Dvd open/close – open/close a player, or List features on cable/satellite receivers
- Home/Guide – Easily access features on today’s streaming devices, or Guide on cable/satellite receivers
- Menu – Displays the on-screen menu
- Up/Down/Left/Right menu navigation
- OK – Select menu items for the controlled device
- Exit – Exit on-screen menus
- Info – Displays of/screens show/content information
- Volume Up/Down
- Channel Up/Down
- Mute – Mutes sound
- Previous Channel – Returns to the previously selected channel
- Numbers – Enter numbers for direct channel selection
- Dot (•) – Used to select digital channels, e.g., 4.1
- Enter key (Some devices require enter to be pressed after channel selection)
Programming Your Remote
Your remote is designed to control multiple audio/video devices. To use it, you will need to program the remote for your devices. There are two different methods you can use to program the remote, Direct Code Entry or Auto Code Search.
- The Direct Code Entry method is the recommended method as it is the simplest and quickest method in most cases.
- The Auto Code Search method searches through all the codes in the remote to find a code for your device. Note: This remote comes preprogrammed for Roku® boxes and Samsung TVs. Press TV for Samsung TVs and storm for Roku boxes.
Direct Code Entry (Recommended)
- Locate the Code List included with your remote. Find the section for the type of device you wish to control, (for example TV, DVD, storm, aux. Locate the brand of your device and circle all the remote codes for the brand.
- Press and hold down the SETUP button on the remote until the red light on the remote control turns on. Release the SETUP button. The red light will remain on. Note: The red light will either be a small light at the top of the remote or the power ON/OFF button.
- Press and release the device button on the remote for the type of device you wish to control, (for example TV, DVD, strm, aux). The red light will blink once and remain on. Note: Any of the device buttons on the remote can be programmed to control any of your devices. For example, you can use the Aux device button on the remote to control a Cable Box, Satellite Receiver, Digital Converter Box, Streaming Media Player, or any device category in the Code List.

- Use the number buttons on the remote to enter the first 4-digit remote code you circled in the Code List in Step 1. The red light will turn off after entering the fourth digit.
- Point the remote at the device. Test the buttons on the remote to see if the device responds as you would expect. If the buttons do not operate the device, return to Step 2 above and use the next code that you circled for that device.
- Repeat Steps 1 – 5 for each device you wish to control.
Programming Notes
- Some codes may operate only a few functions of your device. There may be another code in the Code List that controls more functions. Test other codes in the Code List for more functionality.
- If you do not find a remote code that works for your device or there are no codes in the Code List for your device, use the Auto Code Search method in the next section to program your remote.
- For combination devices such as a TV/DVD combo or TV/ VCR combo, you may have to enter a code for each device.
- Write down the remote codes used to program the remote for future reference.
Auto Code Search
The Auto Code Search is a process where you can search through all the codes stored in the remote to find a code for your device. It is recommended that you read through all the steps below to familiarize yourself with the Auto Code Search before starting the process.
- Manually turn on the device you wish to control. Note: The Auto Code Search process cannot be used for devices without power ON/OFF capability. Use the Direct Code Entry method in these cases.
- Press and hold down the SETUP button on the remote until the red light on the remote control turns on. Release the SETUP button. The red light will remain on. Note: The red light will either be a small light at the top of the remote or the power ON/OFF button. 3. Press and release the device button on the remote for the type of device you wish to control, (for example TV, DVD, storm, aux). The red light will blink once and remain on.
- With the remote pointed at the device, press and release the POWER button on the remote. The remote will send 10 different codes to the device. The red light will blink once for each code and remain on after sending the 10 codes.
Did the device turn off?- If YES, go to Step 5.
- If NO, repeat Step 4 to test the next 10 codes.
- Manually turn the device back on.
- With the remote pointed at the device, press and release the VOL + button. The remote will re-send the first code of the 10
codes from Step - The red light will blink once and remain on.
Did the device turn off?- If YES, you have found a code for the device. Press and release the same device button you pressed in Step 3. This will store the code in the remote. Go to Step 7.
- If NO, continue to press and release the VOL + button until the device turns off to test the other 9 codes from Step 4. Be sure to wait approximately 3 seconds after each VOL + button press to allow the device time to respond to the code. When the device turns off, you have found a code for your device. Press and release the same device button pressed in Step 3. This will store the code in the remote. Go to Step 7. Notes:
- The VOL – button can be used to go backward through each batch of 10 codes.
- The red indicator light will flash 2 times after testing the first or last code in each batch of 10.
- Use the remote to turn the device back on. Test the buttons on the remote to see if the device responds as you would expect. If the buttons do not operate the device, return to Step 2 and repeat this process to search for a better code to operate the device…
- Repeat this process for each device you wish to control.
Controlling Combo Devices
Some combo devices le.g. TV/VCR, TV/DVD, DVD/VCR, etc.) will require you to set up two different device buttons to control both parts of the combo device. For example, if you have a TV/DVD combo, you may need to set up one code under the TV button to control the TV and a separate code under the DVD button to control the DVD.
Favorites Function
Allows the user to program up to 10 of their favorite channels for quick access.
Setup Favorite Channels
- Press and release the device button (TV, DVD, strm, aux). The indicator light will blink once. Note: The user must select the device type that controls the channels; for example, if a user has a Cable Box for controlling channels, then this device button must be selected to properly change the channels on the cable box.
- Press and hold down the SETUP button on the remote until the red light on the remote control turns on. Release the SETUP button The red light will remain on.
- Press and release the FAV button. The red indicator will blink once and remain on.
- Press and release the numerical button (0 – 9) that you will use for storing your favorite channel. The red indicator will blink once and remain on.
- Enter the channel number you wish to program, for example, channels 4, 21, 4-1, 52-2. 6. Press and release the FAV button, and the red indicator will turn off. Your favorite channel is now saved.
- Press and release the FAV button, and the red indicator will turn off. Your favorite channel is now saved.
- Repeat this process for up to 10 of your favorite channels.
Using Favorite Function
- Press and release the FAV button. The red indicator light will turn on.
- Press and release the programmed button for your favorite channel (0-9). The red indicator will blink twice and the remote will send the code for your pre-programmed channel.
Using Your Remote Master
Volume Feature
The Master Volume Feature allows you to select a single device that the volume buttons always control. For example, the remote can be in TV mode while the volume buttons control the volume on your audio receiver or sound bar instead of your TV.
Enabling the Master Volume Feature
- Press and hold down the SETUP button on the remote until the red light on the remote control turns on. Release the SETUP button. The red light will remain on.
- Press and release the device button (TV, DVD, strm, aux) on the remote for the device you wish to control the volume.
- Press and release the MUTE button.
- Press and release the VOL+ button. The red light will blink twice and turn off.
Disabling the Master Volume Feature
- Press and hold down the SETUP button on the remote until the red light on the remote control turns on. Release the SETUP button. The red light will remain on.
- Press and release the device button (TV, DVD, strm, aux) programmed to control the Master Volume Feature.
- Press and release the MUTE button.
- Press and release the VOL – button. The red light will blink twice and turn off.
Code Identification
- Press and hold down the SETUP button on the remote until the red light on the remote control turns on. Release the SETUP button. The red light will remain on. Press and release the desired device button (TV, DVD, strm, aux) you would like the code for.
- Press and release the desired device button (TV, DVD, storm, aux) you would like the code for
- Press and release the ENTER button.
- Press and release the #1 button. Count the number of times the remote light flashes. This is the number corresponding to the first digit of the code. Repeat the process by pressing the #2, #3, and #4 buttons for the remaining digits. Press and release the ENTER button to exit this mode.
Reset to Factory Settings
- Press and hold down the SETUP button on the remote until the red light on the remote control turns on. Release the SETUP button. The red light will remain on.
- Press and release the MUTE button.
- Press and release the number #0 button. The red indicator light will flash twice.
Troubleshooting
The remote does not operate your device.
- Make sure the batteries are fresh and installed correctly.
- Aim the remote directly at your device, and make sure that there are no obstructions between the remote and the device.
- Make sure you select the appropriate device on the remote you wish to control; TV for TV and CBL for cable box.
- Try programming the remote with a different code. See the Direct Code Entry section.
- The remote may not be compatible with your device.
The remote does not operate some features of your device.
- Sometimes a particular code might operate a few features but not all. Try programming the remote with a different code from the Code list. See the Direct Code Entry section.
- Remote may not be able to operate all features of your device or button names may be different than that of your original remotes.
90-Day Limited Warranty
Jasco Products Company warrants this product to be free from manufacturing defects for ninety days from the original date of consumer purchase. This warranty is limited to the repair or replacement of this product only and does not extend to consequential or incidental damage to other products that may be used with this unit.
This warranty is instead of all other warranties express or implied. Some states do not allow limitations on how long an implied warranty lasts or permit the exclusion or limitation of incidental or consequential damages, so the above limitations may not apply to you. This warranty gives you specific rights, and you may also have other rights which vary from state to state. If the unit should prove defective within the warranty period, return prepaid with dated proof of purchase to:
MADE IN CHINA GE is a trademark of General Electric Company and is under license by Jasco Products Company LLC, 10 E. Memorial Rd., Oklahoma City, OK 73114. This Jasco product comes with a 90-day limited warranty. Visit www.byjasco.com for warranty details. Questions? Contact us at 1-800-654-8483 between 7:00 AM -8:00 PM CST.
FCC Statement
This device complies with Part 15 of the FCC rules. Operation is subject to the following two conditions: (1) this device may not cause harmful interference, and (2) this device must accept any interference received, including interference that may cause undesired operation. FCC NOTE: The manufacturer is not responsible for any radio or TV interference caused by unauthorized modifications to this equipment. Such modifications could void the user’s authority to operate the equipment.
NOTE:
This equipment has been tested and found to comply with the limits for a Class B digital device, according to Part 15 of the FCC Rules. These limits are designed to provide reasonable protection against harmful interference in a residential installation. This equipment generates, uses, and can radiate radio frequency energy and, if not installed and used following the instructions may cause harmful interference to radio communications.
However, there is no guarantee that interference will not occur in a particular installation. If this equipment does cause harmful interference to radio or television reception, which can be determined by turning the equipment off and on, the user is encouraged to try to correct the interference by one or more of the following measures:
- Reorient or relocate the receiving anteria.
- Increase the separation between the equipment and the receiver.
- Connect the equipment to an outlet on a circuit different from that to which the receiver is connected.
- Consult the dealer or an experienced radio/TV technician for help.
REFERENCE LINK
[ad_2]
